Ollama WebUI: Easy Guide to Running local LLMs
by Rok Rak, Software Engineer
Introduction
Embark on a journey of ease and efficiency with our straightforward guide to Ollama WebUI. Tailored for both tech enthusiasts and newcomers, this guide is your key to unlocking the simplicity behind a seemingly complex technology. We're here to show you that integrating and utilizing the Ollama WebUI in your system is not just about mastering a new tool; it's about embracing a user-friendly approach to the innovative world of AI.
In the following sections, you'll find clear, concise instructions that will transform your setup process into a smooth sailing experience. Whether your goal is to enhance your workspace with AI capabilities or to explore new technological horizons, our guide is designed to navigate you through each step with clarity and ease. So, let's dive into the world of Ollama WebUI and discover how straightforward and rewarding working with AI can be!
Preparation: Setting the Stage for Ollama
Before we dive into the world of Ollama, let's set up our environment. I'm using a Windows 10 machine packed with 64GB of RAM, a perfect ally for our AI-powered journey. Here’s a step-by-step guide to get everything ready:
-
Install Windows Subsystem for Linux (WSL):
- Open PowerShell as Administrator and run:
wsl --install - This will install WSL with the default Linux distribution, setting the first stone in our path.
- Open PowerShell as Administrator and run:
-
Enable WSL2:
- Ensure your system is running Windows 10 version 1903 or higher. Then, elevate your command powers in PowerShell as Administrator and execute:
wsl --set-default-version 2 - This elevates WSL to version 2, the latest and greatest.
- Ensure your system is running Windows 10 version 1903 or higher. Then, elevate your command powers in PowerShell as Administrator and execute:
-
Install a Linux Distribution (if not installed):
- If a Linux distribution hasn't been automatically installed, head over to the Microsoft Store and pick one, like Ubuntu, known for its user-friendliness.
-
Set Up Your Linux Environment:
- Launch your new Linux friend from the Start menu. A few setup prompts later, and you'll have a shiny new user account and password.
-
Install ollama on WSL2:
- Let's get the Linux system primed with the latest updates:
sudo apt update && sudo apt upgrade - Then, beckon Ollama into your machine:
curl https://ollama.ai/install.sh | sh
- Let's get the Linux system primed with the latest updates:
-
Verify Installation:
- Check if Ollama is ready to roll:
ollama --version - A quick glimpse of the version number, and you'll know Ollama is on board.
- Check if Ollama is ready to roll:
-
Install docker
- Navigate to Docker's official website and download Docker Desktop. Install it following their guide. Once done, launch Docker Desktop to confirm it's sailing smoothly.
And there you have it! Your Windows 10 machine is now an AI-chat-commanding powerhouse, ready to embark on the Ollama voyage!
Running Ollama WebUI
Now, let's turn our attention to the Ollama WebUI. With everything in place, launching it is a breeze. Follow these steps, and you'll be chatting with AI in no time!
Starting the Engine
Kick things off by executing this command. It's your golden ticket to downloading and launching the Docker image:
docker run -d -p 3000:8080 --add-host=host.docker.internal:host-gateway -v ollama-webui:/app/backend/data --name ollama-webui --restart always ghcr.io/ollama-webui/ollama-webui:mainPatience is Key
Hold tight while the Docker does its thing, pulling the image into your local setup. This is a one-time space journey, so a little patience goes a long way.
Landing on Port 3000
Success! The server is now live on port 3000. Simply navigate to localhost:3000 on your preferred browser, and you're all set.
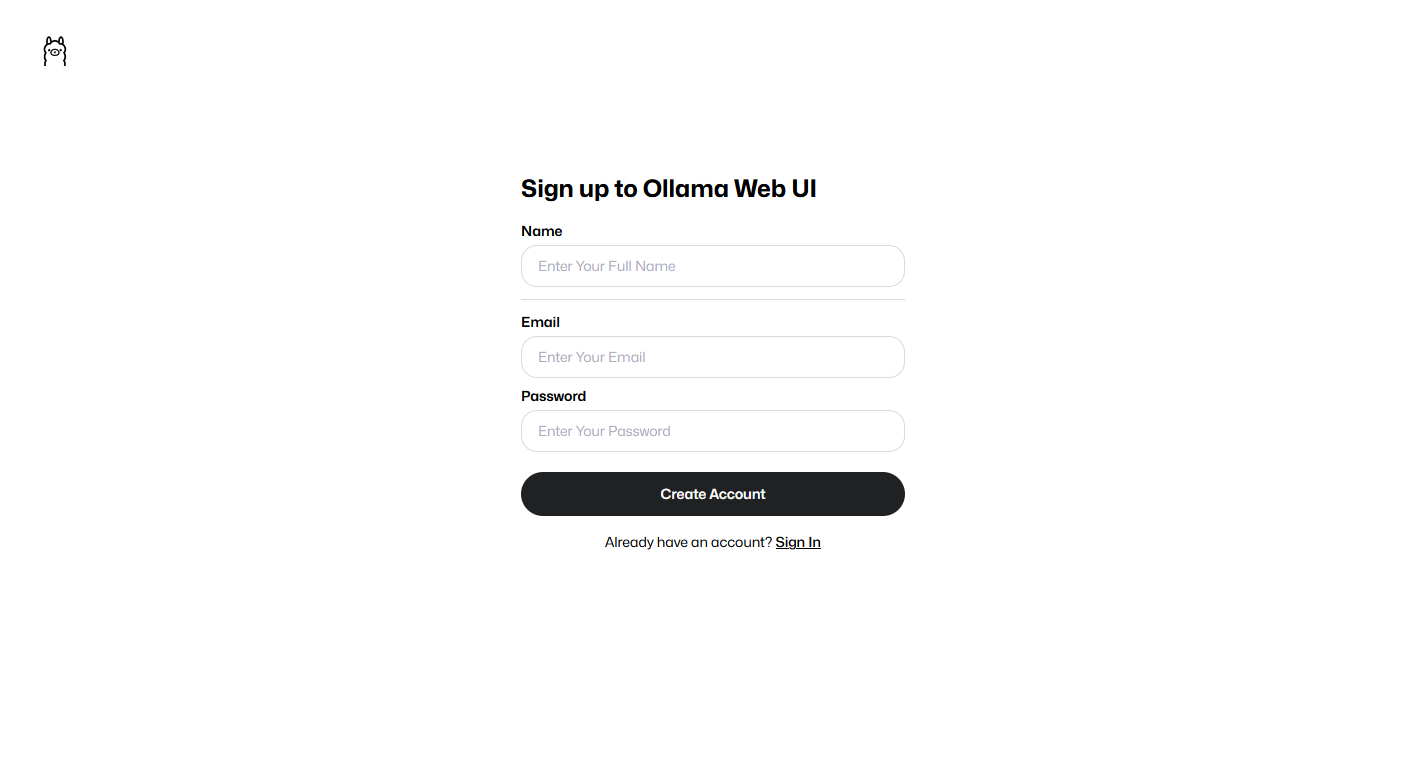
First Contact
Here's a sneak peek at what you'll see when you first launch the page. Remember, your first mission is to set up an admin account. Hit the 'Sign Up' button and register. This account will be your local command center.
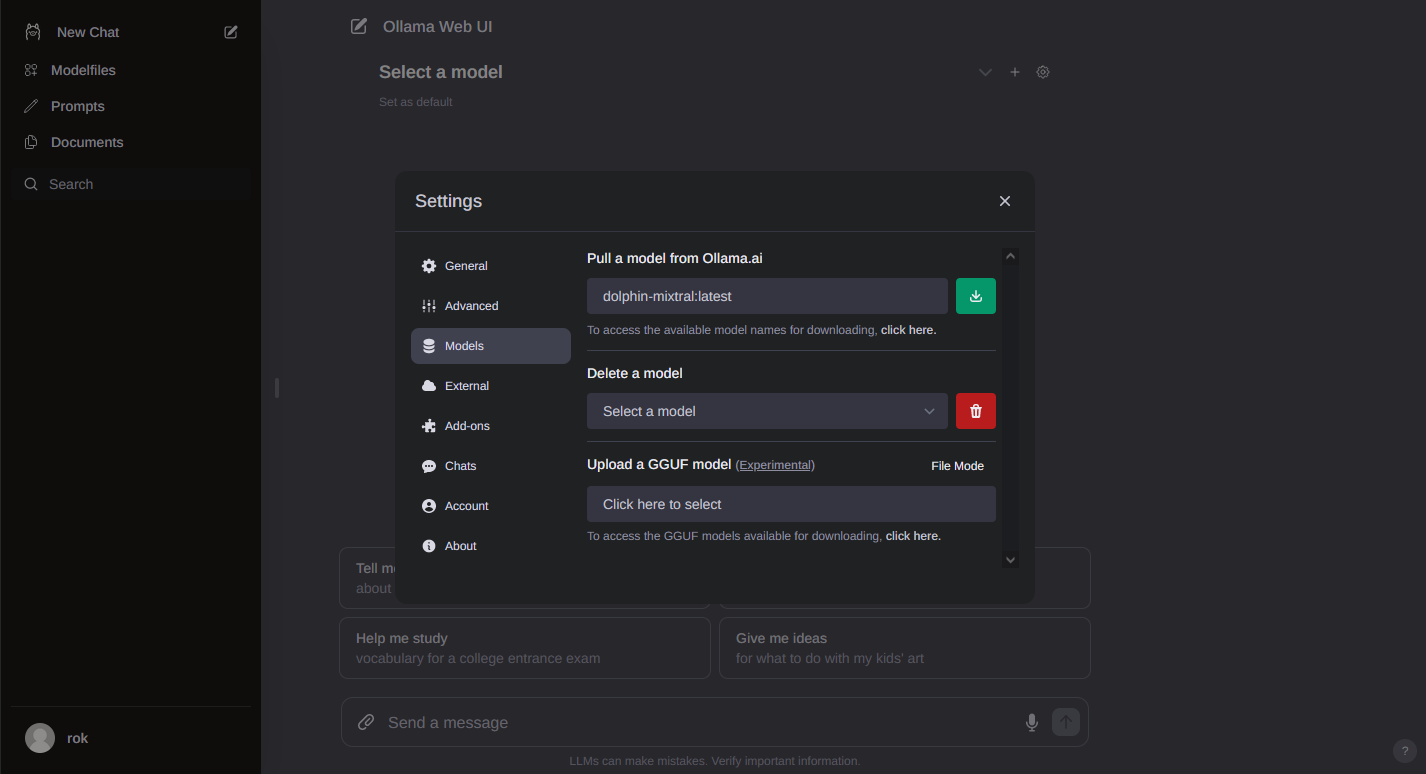
Adding New Models
Once your account is up and running, you'll find yourself on the frontpage. Here’s where the fun begins! Want to add a new model? Click on the settings tab in the top right corner and navigate to the models section. Let's try adding the 'dolphin-mixtral:latest' model.
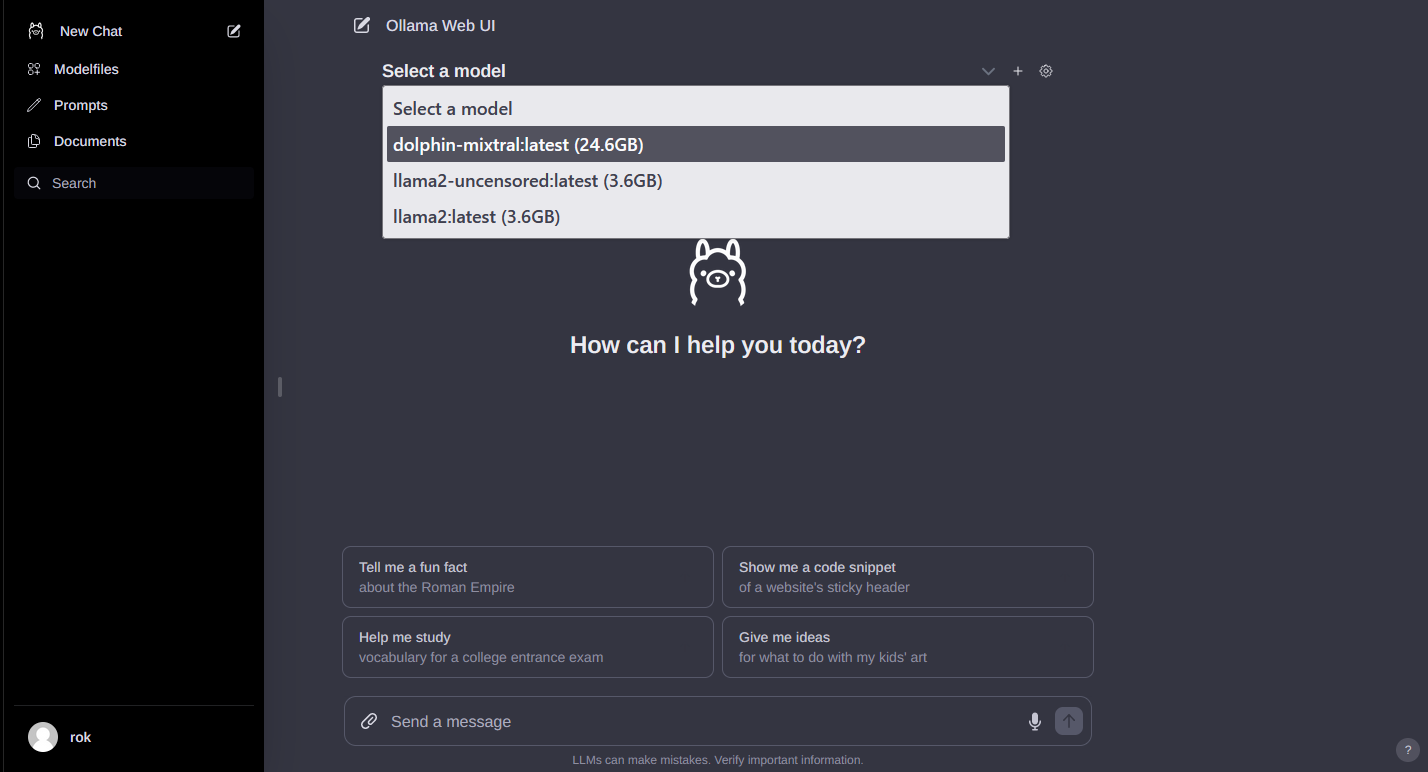
Final Countdown
Wait for the model to load. You'll know it's ready when a toast message pops up to let you know. The last step? Select your downloaded model and start exploring the wonders of Ollama WebUI!
Happy exploring! May your chats be enlightening and your models ever-efficient.